the adventures of a girl, her dog, and two cats.
Showing posts with label insulation. Show all posts

Saturday, April 13, 2013

sweet victory (a/k/a project: vent hose replacement)

It has been longer than usual between posts for me, but owing only to how busy I've been now that the warm weather has arrived and the endless list of boat projects has emerged from winter hibernation.

Before I get into the saga of replacing the vent hoses on the holding tank, I have to share a couple of snaps of this groovy grocery bag I picked up for 99 cents at Trader Joe's. It has liveaboard written all over it...


So, we left off at my six-month-aboard anniversary and the old vent hose on the holding tank had thumbed its nose at my attempts to remove it. A good friend volunteered to help me with the project this past Sunday despite my admonishments that it was a tough, smelly task. When we had beaten the job into submission, he wouldn't even let me pick up the tab at Davis'. I'm sure blessed with some great friends!

One of the initial challenges was that I needed better access to the tank fittings, as I had been working only through a small access port. To gain access above the tank we needed to remove the v-berth mattress, which in my boat is one enormous foam mattress (in some boats, the v-berth takes two or three cushions assembled together). The mattress was also it's own "project" that day. Months ago the cats had peed on the mattress before I had managed to cut a protector to fit it, and my treatments with Nature's Miracle had not been thorough enough, so there was occasionally a residual cat pee odor--not pleasant. The winter condensation also meant that mold had returned in the forepeak. Thus, the mattress was it's own icky, smelly project. I would love to get a new mattress, especially as this one is not friendly on my back, but at $2500 and up... the boat repair and outfitting fund can't swing that yet.

The mattress is heavy and unwieldy. Removing it was not an easy job even for the two of us. But we pulled it out, carried it up the side deck, and laid it out on the foredeck in a way that maximized air circulation around it. The sheets had gotten wet and moldy along one side, but the mattress itself did not have any mold. I poured a very hefty dose of Nature's Miracle all over the mattress and let it air out in the sun all afternoon. When the day came to a close and we put the mattress back in I felt there was still some residual smell, so I sprayed the surface again with Nature's Miracle, left the port lights open in the stateroom, and aimed a fan at the mattress. We all spent the night on the settee in the main cabin, with barely any room for me beneath the menagerie of pets.


After another day letting the mattress air out and dry, the offending smells were gone. Virtually any cleaning job can be mastered, but some of them simply require the right product and enough time.

With the mattress out of the stateroom, we could now unscrew the piece of shelving atop the holding tank for open access to the tank fittings. Forward of the holding tank were two storage areas, so I said a little prayer for there to be lots of fancy boat equipment hidden away and forgotten by the prior owners. Alas, the lockers were filled with fiberglass housing insulation, some of which had gotten wet and moldy from condensation and some mystery water that kept seeping into the bottom of one locker (bilge water, presumably). There was also more Reflectix insulation in the lockers as well, which is the boat-appropriate insulation to use. Here are some photos of the lockers. I expect I will put a lot of winter clothes and such in space bags and store them there; the lockers are huge. I could just barely reach the bottom.


Now we were ready to tackle the main project. As one friend/reader had noted, sometimes you have to spend hours prepping to have good access for a job, but then the job will take fifteen minutes instead of five hours. I wish this had been a fifteen minute job, but it surely would have been even tougher had we not removed the mattress first to gain better access. Here's the view of the top of the holding tank.


I left off with a small piece of hose stuck on the port vent fitting. I had tried previously to get a knife under the hose to break the seal that had formed over the years, but even the thinnest knife did not want to shimmy in there. 007 from S/V Octopussy had explained that the fitting is not smooth, but rather has a series of grooves. Once I could actually see that on the fitting I understood why it was so hard to try to pull the hose off--over the years the hose depresses into those grooves, as shallow as they are, and locks itself in. We followed a tip from 007 and repeatedly carefully cut at the hose lengthwise while pulling the hose away with a pair of needlenose pliers to help it split. It was a painstaking process both due to the stiffness of the hose and the fear of damaging the fitting, but it worked well. Although I had tried cutting the hose with this utility knife during my first stab at the project, between being a girl and having a nagging rotator cuff tear, this part of the job really benefited from the brute force a guy could contribute.


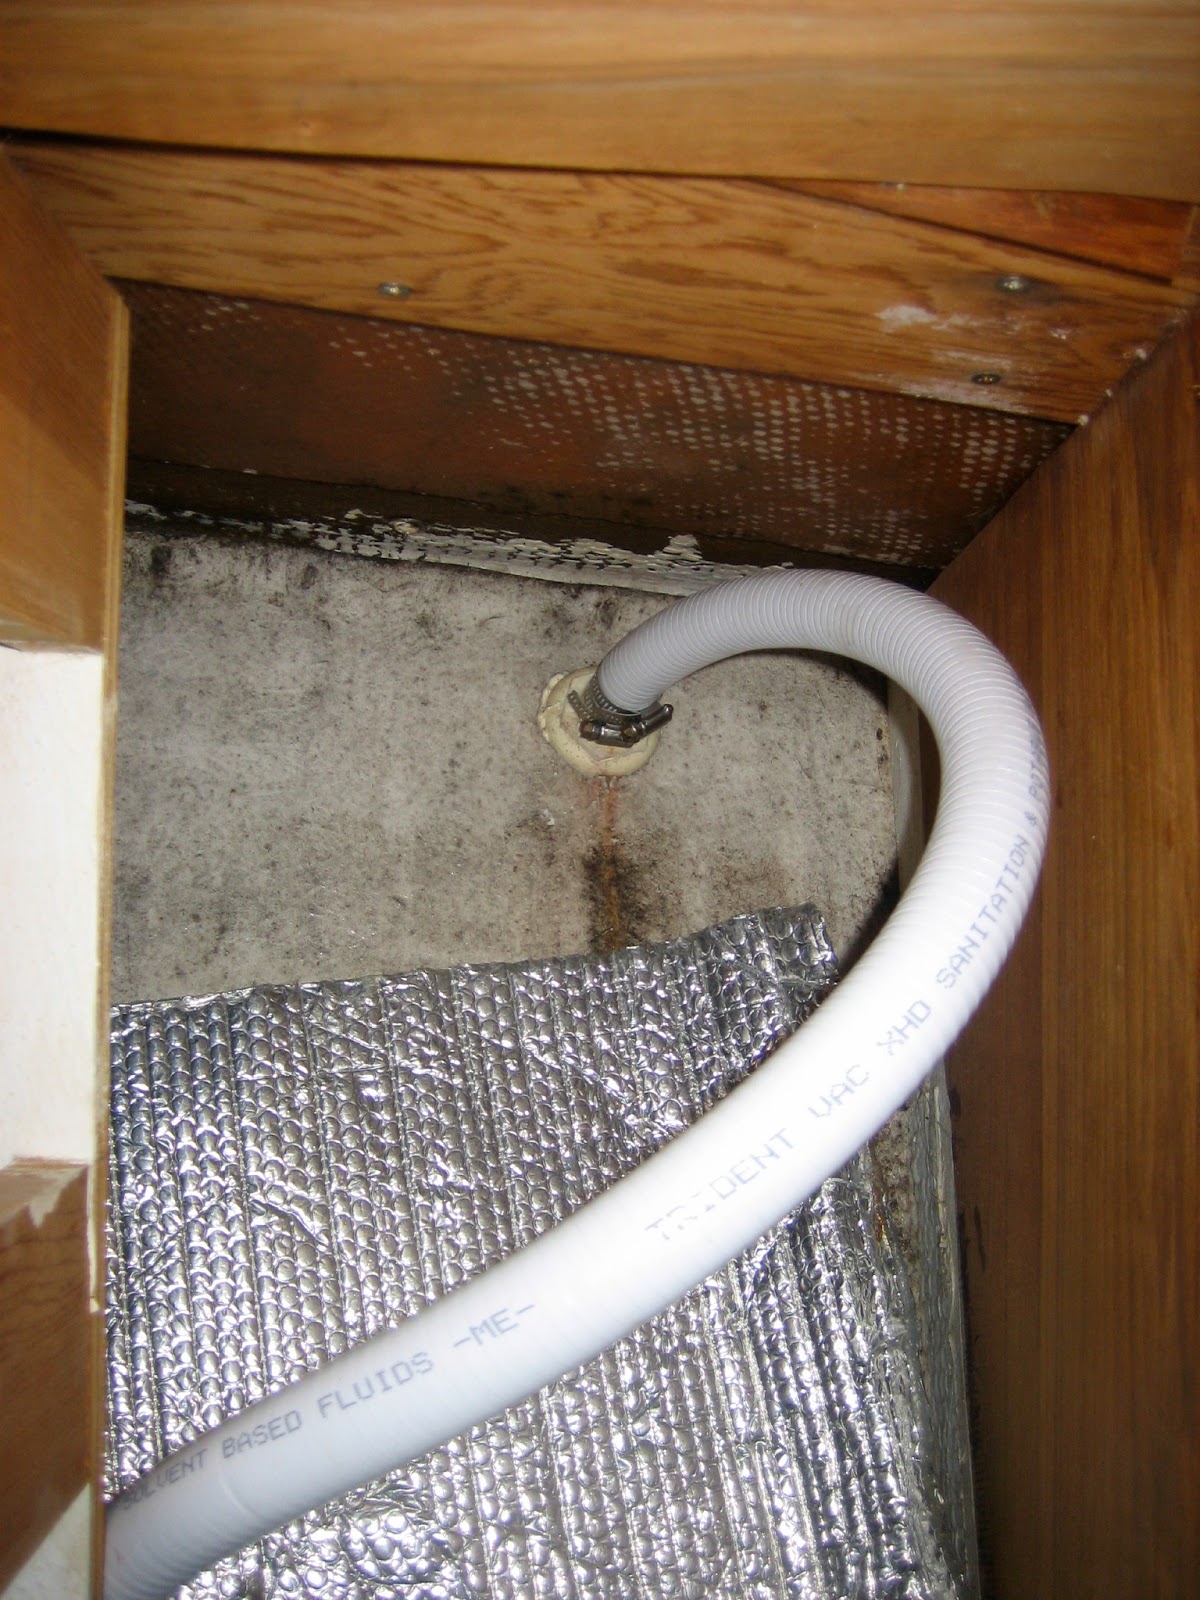
We high-fived and congratulated ourselves when we got that hose off. We figured putting the new hose on would be a snap. I had done plenty of studying up from Nigel Calder and Peg Hall (a/k/a The Headmistress) on how to install the hoses. First we pulled the new hose through to gauge that the length was correct. I had erred generously, and we used the hack saw to take off about 18 inches of extra hose. I climbed in the port hanging locker and the hose went on the thru-hull fitting with relative ease. I tightened down the hose clamps with a screwdriver. Yep, we were cruising along now.


Yeah, not exactly. We lubed up the hose and tank fitting with Teflon grease but the hose would not come close to going on that fitting. I boiled some water on the stove, we soaked the end of the hose in it for a minute or so, and it slipped right on. Nigel Calder's not-inexpensive textbook on boat mechanical and electrical systems was well worth the price just for that one tip! (He strongly recommends this approach over use of a heat gun, which has a greater likelihood of damaging the hose). We tightened down the hose clamps and patted ourselves on the back.


Now on to the starboard hose. We sawed off the hose a bit aft of the fitting and followed the same utility knife and needlenose pliers procedure to remove the remaining length of hose. Then came the thru-hull end. Rather than a hanging locker, this thru-hull is tucked behind a set of drawers. We pulled the drawers out and then realized that the drawer frame posed a significant obstacle to accessing the thru-hull. It was a major contortionist exercise to reach the hose clamps with a screwdriver and loosen them enough to be able to free the hose. I tried sliding my head and shoulders sideways through one drawer space but could not quite reach. I then perched beside the drawer frame and reached my arm through as far as possible while my friend shined a flashlight at the hose clamps. Every quarter-turn of the screw was a major accomplishment. We took turns trying to get at the hose clamps and just needing a break from the heat and the residual "eau de holding tank." We sawed off the hose at that end as well, leaving about a foot of hose to grab onto and yank it off the thru-hull. I'm not sure these photos really demonstrate how difficult it was to reach that thru-hull.


When we had removed the old hose we easily followed the same routine of Teflon grease and soaking the new hose quickly in boiling water to attach it to the tank fitting. Then came attaching the new hose to the thru-hull. Reaching in to tighten the hose clamps was the toughest part of the entire project. At least when trying to loosen the old ones we could get torque on the screwdriver because the clamps were tight. But trying to tighten clamps that just want to spin about...impossible. We tightened them down as much as possible before sliding them into place by pushing them with pliers and the screwdriver. But we simply could not reach the screws and get any purchase to tighten them down. We pulled out a borrowed socket set and found a socket that would work. Our momentary joy was quickly squelched when we realized that socket needed a smaller ratchet than we had. I popped out and asked the guy a couple slips down if he had the ratchet we needed. He did. Unfortunately, the handle was too short for us to reach the hose clamp. My friend quickly devised a solution.


So with our taped-together ratchet-screwdriver tool my friend managed to reach in and tighten down the hose clamps. It was still no easy task because the space to maneuver the tool was tight, but it worked. And with luck, that particular job won't need repeating for another ten years.



And so, sweet victory. My friend and I each learned some things from the other during the project and it's always good to have a friend who can McGyver stuff to find a work-around. I have had the luxury of using the head aboard for almost a week now, and offending cat pee and holding tank aromas are a thing of the past. Yep, I'm living the dream.

Tuesday, April 2, 2013

six months aboard

Half a year aboard. I guess that's something of a mini-milestone and the next temporal one will be a year. Yesterday I started early with projects, feeling some momentum to make headway. At least I managed to bail out the dink.

Looking around inside the boat, it appears I've made little to no progress in the past six months. Clothes are in bags and piles. Random clutter inhabits every surface. It seems as if no amount of vacuuming can keep pace with the dog's shedding.

The weather yesterday was beautiful. Finally warm enough to open all the port lights, let in some sun and fresh air. The two projects I really wanted to get to were replacing the holding tank vent hoses and drilling out the hinge screw holes on my companionway door, then filling the holes with epoxy and wood plugs. A warm, dry day is best for epoxy work so that it will cure well. I should have started with the latter project so that perhaps next weekend I could re-sink the hinges and have a functioning door. Instead, I decided to tackle the vent hoses first. Getting rid of the stinky permeated hose would let me put away clothes in the hanging locker and free up space in the cabin, making it easier to clean and organize.

In theory, vent hose replacement is simple. The only tool required is a screwdriver for loosening and tightening the hose clamps. In practice, the job was not so simple. I went to work on the thru-hull connection first. I contorted myself to reach the hose clamps and quickly got them loose. I twisted, tugged, and pulled the hose, but it would not come free from the thru-hull. I worried that the fitting would fall out into the water and considered duct-taping it down outside. Donning my goofy headlamp, a mask for mold and smells, and rubber gloves, I begrudgingly went a couple slips down and asked for help. To be clear, I was only asking for their advice on how to remove the hose. I just don't think you can ask for volunteers with head-related projects; those projects are icky and smelly enough that I think you have to pay real cash money to someone to help. But one guy offered to hold down the thru-hull from the outside while I tried to break the hose free. He seemed to think the thru-hull was not going anywhere and was nice enough to come inside and after some twisting and pulling get the hose free of the fitting.

On to the unpleasant end of the project: disconnecting the hose at the holding tank fitting. The working space there is much smaller unless I disassemble part of the berth, which is likely what I will end up having to do because the starboard vent connection is even harder to reach than the port one I was working on yesterday. I loosened the hose clamps, one of which promptly broke anyway. I was able to twist the hose back and forth on the fitting, but like the other end, it would not come free of the fitting. I figured it may be easier to work with a smaller section of hose, so I used a hack saw to cut the hose away about an inch past the fitting. I stuffed a paper towel in the end of the hose to cut down on the smell and took a study break.


I looked online and found no useful information or handy YouTube videos (apparently no one on Sailnet or Cruisers' Forum has had this problem...not likely, but I can believe they wouldn't admit to it.) I referred to Nigel Calder's Boatowner's Mechanical and Electrical Manual and Peg Hall's Get Rid of Boat Odors. They both have useful information for installing the new hoses, e.g., Nigel Calder suggests dipping the end of the hose in boiling water to soften it to slip over the fitting more easily (rather than using a heat gun), and Peg Hall suggests lubing the fitting up with some K-Y. I will likely use both suggestions. But to remove the old hose that is stuck on the fitting the only advice I've found is to soften it with a hairdryer. I was hoping to avoid that because I will have to link a couple of extension cords together to reach all the way inside the boat since plugging a hairdryer into the boat's electrical system would almost certainly trip the breakers.

Hunter studying up on Nigel Calder's plumbing guidance.
I went back to the project a couple of times, trying to pry the hose off the fitting with a screwdriver, (which risks damaging the fitting), and trying to cut the hose section with a utility knife, which could also have damaged the fitting if the knife hadn't been utterly useless against the hose. I really wanted to finish that project, or at least one of the hoses.

Six months in and I can't even finish this simple project that requires no power tools. I know exactly how to do the job, but I'm not strong enough to pull the stupid hose off the fitting. I hate that feeling of defeat, weakness. I will probably have to hire someone to help me with this simple project, but don't even have the money to hire anyone right now. At least the port hose is removed and I can plug the fitting for now. The tank is still vented to starboard. I can clean the hanging locker again--the moisture and mold keep coming back from the cold weather--line the locker with some insulation, and actually hang some clothes there. I guess I have to find the little success even if I lost the battle against the vent hose for now.

As if my plate wasn't full--though admittedly, no matter how much progress one makes the boat project list never shrinks--I also need to follow up on the water pump. The new pump occasionally cycles on when no faucet is open. That is a sign of a leak. I get weak pressure at the galley sink, but very forceful pressure in the head sink, which is twice the distance from the pump. Investigation has revealed that the separate spray nozzle at the galley sink drips quite a bit when the faucet is on--but does not do so when the faucet is off. It's a leak that needs to be dealt with, and may account for the lag in pressure there, but I don't think it's the cause of the water pump cycling on when it shouldn't. It seems that the cycling on problem occurs when the water heater is on, which I only use for hot water for dishes as it draws a lot of electricity. My working hypothesis right now is that there is a leak somewhere between the water heater and the pump. It's a project I will bring in help for so that I can learn how to find and fix it without further mucking anything up. I also want to know whether I have a heat exchanger on my water heater; if so, I can heat water from the engine's heat when motoring, which would be quite useful when cruising.

Although I am frustrated that I have not made more progress in these six months, that I have not renamed the boat or held boatwarming festivities, I am trying to cut myself some slack and give myself credit for learning how to survive winter aboard a boat, learning how to manage three pets aboard, for embracing a lifestyle I was meant for but that certainly presents its quirks and challenges. I am grateful I have many local friends I can turn to if I want advice, since oftentimes the folks most insistent on offering up their advice aren't the ones whose advice you actually want.

I couldn't pass up these adorable Easter lambs on sale today:


I had a great Easter brunch with good friends. But I do miss Easter baskets. I prefer to give gifts than to receive them; I love to pick something special for someone and see them enjoy opening a gift. And although I am not religious, I am very spiritual and embrace the renewal, fertility, and rebirth that bunnies and eggs represent. Now that spring is blossoming I must focus on renewing myself through running, a rebirth (i.e., renaming) of the boat, and getting the boat in shape for a boatwarming and general entertaining. Progress will come. It has to be our turn for some fair winds.

Tuesday, February 12, 2013

project: clean up the salon (before and after pix)

Let's just start out with the simple fact that I am not a very good nor diligent housekeeper. I would rather live in my living space than keep it impeccable in case of company. Am I a bit embarrassed that my home is always rather cluttered? A smidgeon, yes; but not much and not enough to motivate me to change my ways. Instead, when I have guests I ply them with liquor so that they will be in good spirits and hopefully ignore or forget the clutter. If having the settee and cushions "just so" is more important than good company, good drink, and good food, they probably won't long be my friends anyway.

That said, there is a point at which the space is no longer functional when piled high with clutter. Those who visited my home when I lived ashore know that moving aboard was a harsh intervention for this hoarder! So, admitting that one does actually need to be able to sit on the settee...I undertook to enforce some order upon the space.

Settee, piled high with clothes and "stuff"
Dinette, piled with tools, insulation, cushions and more clothes
Crew cuddle cups at the dinette
Nav desk piled high with tools, cleaning supplies, and running gear
Don't think for a minute that I don't know where everything is aboard. It may be crazy, but I can thrust my hand into the middle of a stack of "stuff" and pull out the tool or gloves I was looking for!

Cleaning up the salon was not simply about relocating the piles of stuff so that some surfaces were visible. Storage lockers needed to be cleaned, bulky housing insulation removed, and Reflectix insulation properly installed. The dinette was missing a cushion. Other cushions needed to be re-purposed.

Eewww! Wet, moldy housing insulation taking up needed storage space!
I am loathe to hack up items and risk ruining them. But that's silly. These huge cushions from some fancy chairs I got rid of in 2005 were taking up space aboard. They were four inches too big to fit the dinette.

24" x 30" when I need 24" x 26"... what to do?
Took the plunge, tossed the cover, and cut away the batting
Just need to trim the cushion down
Used my dad's river knife to trim the cushions
I saved the "logs" of foam I trimmed from the cushions and saved the batting. I now have my sewing machine aboard, so when I get around to it, I will make some roll pillows and sew up some nice covers for the dinette cushions. For now, some sheets folded around them will suffice.

The dinette seats two, if the cats will let you in
And the settee can actually seat a few guests, or I can stretch out for a cat nap.

The settee to starboard also has a large table that drops down from the bulkhead
I haven't managed to clear off the nav desk yet and the ample galley gear and provisions are still in the process of finding their "spots." I cannot afford to waste space and need every locker to be used in the most space-efficient manner I can muster. My djembe (drum) does double-duty as a laptop desk!

I freely admit I still have too much stuff, both in general and on the boat, but it is a process to weed out the items I really can put to good use and that which I can live without--and which is which is not always what one may first assume! Nonetheless, it feels good to make little bits of progress aboard here and there, chip away at the "to do" list, and meet wonderful new liveaboard friends along the way.

Wednesday, December 26, 2012

project: window insulation

I should have tackled this project much earlier in the season, but this morning I managed to get through the first step of my window insulation project. All but one port light is now lined with bubble wrap. (I ran out of double-stick tape to do the last window so I'll knock it out once I've made a run to the store.)


I also have window shrink wrap, so I may add another layer of bubble wrap to the larger windows and then shrink wrap them. I've been told this small project will really help keep the boat warmer, and since I have metered electric, that will hopefully translate into some financial savings for me, as well. I figure I will leave the insulation up year-round since keeping cool air-conditioned air inside in the summer will be just as useful as keeping the heat inside in the winter.

In keeping with the maxim that every item on a boat should serve a least two functions, these are now my "curtains" as well. They have the nice benefit of allowing in light but very much obscuring the view for privacy. I had planned to sew curtains from some beautiful natural linen fabric I have, but I think curtains will actually make the interior look smaller and more cluttered. I may reconsider wanting curtains come springtime when I open those port lights and want the privacy...but for now I'm happy with my multitasking bubble wrap.

The other insulation-related tasks I still have to get to include filling the forward hatch with big fluffy insulation, tucking big fluffy insulation around the holding tank and random other places I find to fit it that are not otherwise storing things, and placing the pieces of Reflectix that I have up against the hull wherever I can to fight condensation and mold and to insulate the boat.

Christmas dinner last night... heat and serve mac and cheese.


It's not like my homemade, but it's pretty good and I'm very glad the holiday is over. Three years ago was the last Christmas I spent with my father. I was there at the cabin in Oregon, cooked up a feast, and watched football with my dad. This was the first Christmas since he died, and the holidays are now just a reminder that he's gone. Without a significant other or children to share the holidays with, I'd rather just fast-forward to spring.

Solar charger update: I charged up the Opteka solar panel I bought on Amazon and decided to try it out for charging my cell phone. It took a few hours to charge my phone from 55% to 100% but the solar panel still had juice in it.


It's nice to know I have that emergency back-up, even if it does require sunny weather. Today is a frightful mix of snow, sleet, and rain...another perilous trip down the finger pier, so pup dog is in for the day and I am hopeful it will just be raining when I need to take her out this evening.